When summer gets hot, having a cool home feels amazing. A central air conditioner doesn’t just cool the air. It also helps clean the air, lowers humidity, and can make your home worth more. If you’re adding a new system or changing an old one, knowing the central air conditioner setup steps can help you save time, money, and avoid problems.
This guide covers every step of the process. You’ll learn how to plan, choose the right unit, understand parts like ducts and vents, and keep your system running well. Knowing basic HVAC installation helps you make wise choices and get the most from your central air conditioner setup.
How a Central Air Conditioner Works
Before you begin the central air conditioner setup, it’s helpful to understand how the system works. It pulls warm air from your home, cools it through an evaporator coil, and then pushes the cooled air back into each room through connected air ducts.
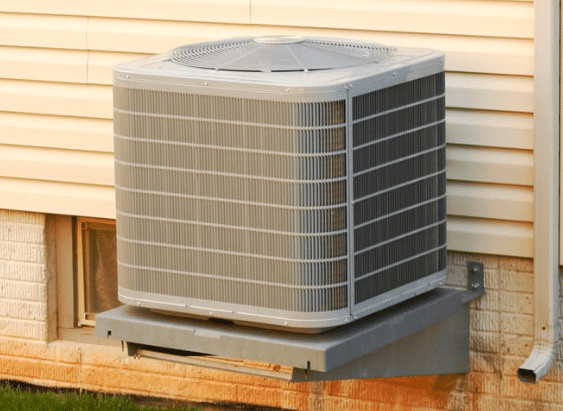
A central air conditioner setup has an outside unit, an inside air handler or furnace with a coil, a thermostat, and air ducts. These parts work together to keep your home cool. Knowing what they do helps you make better choices and stay comfortable.
Pre-Installation Tips for Central Air Conditioning
Installing a central air conditioner isn’t a one-size-fits-all job. Planning is the first and most important step in a successful central air conditioner setup. You need to assess several key factors:
1. Size of Your Home
The size of your home plays a big role in your central air conditioner setup. If the unit is too small, it won’t cool your home correctly. It may cool too fast if it’s too big without removing humidity. Choose the right size for better comfort.
2. Energy Efficiency
Energy efficiency is very important in a central air conditioner setup. Pick a system with a high SEER rating. A higher rating means the unit uses less energy and lowers monthly bills. ENERGY STAR systems are a smart and money-saving choice for long-term use.
3. Ductwork Inspection
Before starting your central air conditioner setup, check the ductwork. Look for cracks, leaks, or blockages that prevent cool air from spreading. If needed, call for AC repair to fix any issues so your system runs smoothly and keeps your home cool efficiently.
4. Electrical Requirements
A central air conditioner setup needs the correct electrical setup. These systems use a lot of power and must have their circuit. Ask a licensed electrician to check your panel and wiring to ensure everything is safe and ready for the new unit.
How to Choose the Best Central Air Conditioner
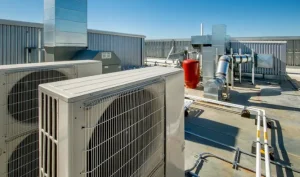
Once you’ve done the preliminary assessments, it’s time to choose the right unit. Central air conditioners come in different types, including split systems and packaged units.
Split Systems

The most common type, split systems, have an outdoor unit containing the condenser and compressor and an indoor unit with the evaporator coil. They are suitable for homes with existing ductwork.
Packaged Units
These systems house all components in one outdoor unit, often installed on a roof or concrete slab. Packaged units are ideal for homes with limited indoor space or without existing ductwork.
While choosing a system, consider the following:
- Cooling capacity: Measured in BTUs (British Thermal Units) or tons, this should match your home’s cooling needs.
- Brand reputation and warranty: Select models backed by a strong warranty for peace of mind.
- Noise levels: Modern units operate more quietly, a significant advantage for indoor comfort.
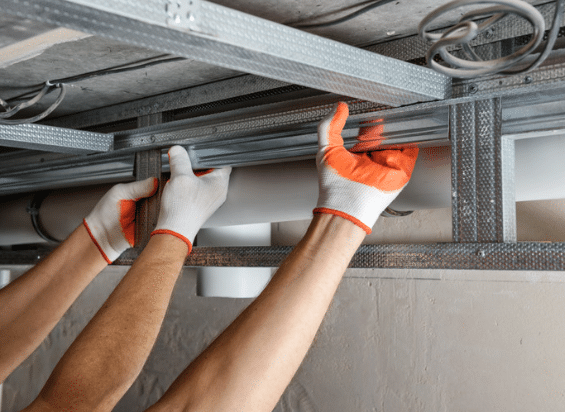
The Central Air Conditioner Setup Process
After planning and selecting the right system, it’s time for the actual setup. Here’s what the process typically looks like:
1. Site Preparation
The first step in central air conditioner setup is getting the area ready. The outdoor unit needs a flat, strong spot with space around it for air to move. A good location helps the system run better and last longer.
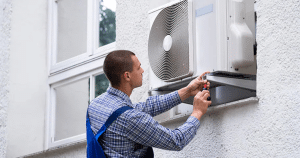
2. Mounting the Condenser Unit
The outdoor unit is placed on a concrete base or strong mount in this part of the central air conditioner setup. It’s leveled and made steady to stop shaking. The pipes that carry coolant are then connected to the indoor unit.
3. Installing the Indoor Coil
The indoor coil is put above or next to the furnace. It connects to the home’s air ducts and the pipes from outside. A drain pan and pipe are added to catch and remove water that builds up during cooling.
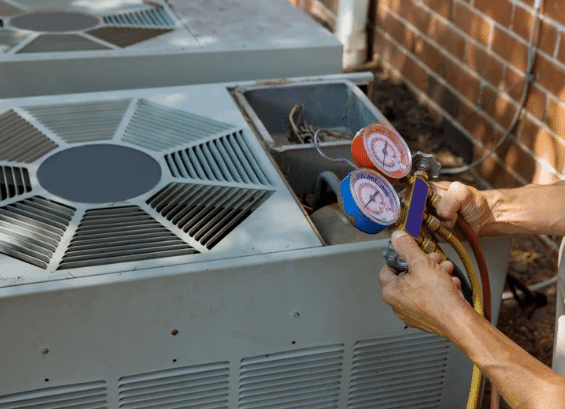
4. Refrigerant Line Connections
In this step of the central air conditioner setup, copper pipes are run between the indoor and outdoor units. These pipes are cleaned of air and moisture before adding refrigerant. This keeps the system working right and avoids any leaks.
5. Thermostat Wiring and Installation
A thermostat is added to control the temperature. Many people choose smart thermostats for better energy savings. It’s wired to work with the system, giving you control over how cool your home gets during the day or night.
6. Electrical Hook-Up
The air conditioner is connected to your home’s power box using its own breaker. This makes sure it gets the right power without overloading anything. This central air conditioner setup step is important for safe and smooth running.
7. Final Inspection and Testing
The last part of the central air conditioner setup is checking the system. HVAC technicians test how it cools, make sure everything is safe, and fix minor problems. This helps the air conditioner work well right from the start.
What Should You Expect During an Air Conditioner Installation
Central air conditioner setup typically takes one to two days, depending on the project’s complexity. Here’s a basic breakdown of what to expect:
- Technicians will arrive early and review the setup plan with you.
- Noise and some disruption are to be expected as work progresses.
- Access to your attic, basement, or crawl space may be required.
- Old equipment, if any, will be removed and disposed of properly.
- Technicians will clean up thoroughly after completing the job.
You should receive an owner’s manual and final documentation outlining the warranty, maintenance tips, and system specifications.
Post-Installation Tips for Central Air Conditioner Setup
After the central air conditioner setup is complete, proper usage and maintenance will help ensure peak performance and longevity.
1. Regular Filter Changes
To keep your central air conditioner working well, change or clean the air filter every 1 to 3 months. A dirty filter makes the system work too hard, uses more power, and can break parts. Clean filters help air move better.
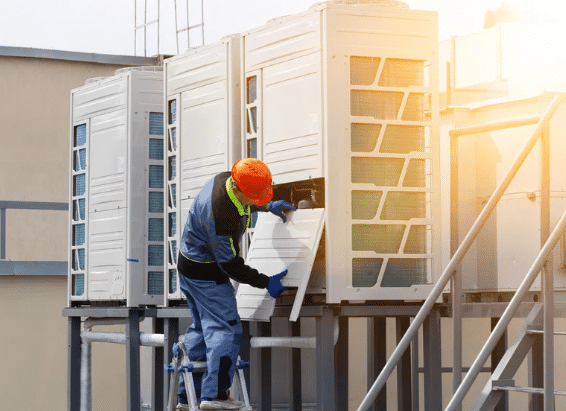
2. Annual Maintenance
Your central air conditioner setup needs a check-up once a year. Call a professional HVAC maintenance technician to clean parts and find minor problems in the spring. This helps stop big issues later and keeps your system cooling your home the right way.
3. Smart Thermostat Use
A smart thermostat helps your central air conditioner setup save energy. It lowers cooling when you’re not home and learns your schedule. This means your home stays cool when needed, and you won’t waste money on power.
4. Keep Vents and Ducts Clean
Don’t block vents with furniture or curtains for your central air conditioner setup to work well. Clean air ducts help cool air flow better. Getting the ducts cleaned every few years can also make the air in your home fresher.
Mistakes to Avoid During Central Air Conditioner Setup
A central air conditioner is a major investment, and mistakes during installation can lead to inefficiency or early failure. Avoid these common errors:
- Undersized or oversized units: Always perform a proper load calculation to match your system to your home.
- Poor ductwork design: Leaky or improperly sized ducts lead to wasted energy and poor airflow.
- Improper refrigerant levels: Too much or too little refrigerant compromises cooling and can damage the compressor.
- Incorrect thermostat placement: Placing the thermostat near windows or appliances can cause inaccurate readings and poor system performance.
Cost of Central Air Conditioner Setup
The cost of setting up a central air conditioner depends on your home size, location, and system needs. Knowing these costs helps you plan better and avoid problems while keeping your home cool and comfortable during hot days.

Is DIY Installation Recommended
Installing a central air conditioner is not safe unless you are trained. It includes wiring, setting up ducts, and handling special cooling gas. Doing it wrong can cause damage and lead to expensive problems later.
Only licensed workers are allowed to handle the cooling gas. A trained HVAC installer will follow safety rules and local building codes, helping the system work better and last longer. Getting help from a pro ensures that your home stays cool and safe without future trouble.
Frequently Asked Questions
What is needed for central air conditioning?
To have central air conditioning, you need an outside unit, an inside unit, pipes, ductwork, and a thermostat. You also need power and good airflow in your home. All these parts work together to keep your house cool with a central air conditioner.
How should I set my central air?
It’s best to set your central air to 75°F to 78°F in summer. This keeps your home cool without using too much energy. If you’re leaving home, raise the temperature a little to save money and help your central air system last longer.
Can I install a central air conditioner myself?
It’s not safe to install a central air conditioner by yourself. It takes special tools and knowledge to handle wiring, pipes, and heavy units. A trained expert should install central AC to make sure it works right and doesn’t cause damage or safety issues.
Can you put central AC in any house?
Most houses can have central AC, but some may need ductwork or other changes. Older homes might take more work. A professional can check your home and tell you what’s needed to install a central air conditioner the right way.
Conclusion
Choosing the correct central air conditioner setup is a smart way to keep your home cool, lower energy bills, and improve indoor air quality. A well-designed system manages humidity and, with proper HVAC installation, adds value to your home.
We guide you through every step, from choosing the right unit to setting up and testing the system. Each step is handled carefully to ensure your air conditioner works efficiently and lasts for years. The goal is long-term comfort and reliability.
Regular HVAC maintenance keeps your system running smoothly. If you’re ready for a new setup or need an upgrade, AC Repair DFW is here to help. Call us today to schedule your central air conditioner setup and enjoy worry-free comfort at home.
End Note
If you’re planning a central air conditioning installation, AC Repair DFW is the team you can trust. We offer expert HVAC repair and friendly service to keep your home cool, save energy, and make your system last longer.
We are proud to offer high-quality HVAC care with a personal touch. Learn more about our mission and team on the About Us page. For helpful tips and seasonal advice, visit the AC Repair DFW Blog. Keep your system in top shape year-round with our residential HVAC maintenance plans.
Stay connected through Facebook, Instagram, and X for updates, tips, and more. Visit our contact page to schedule your service and let AC Repair DFW handle your heating and cooling needs with skill and care.